Managing Application Users
Clicking the “Manage Users” link in the “Client Administration” area opens the “User Overview” screen.
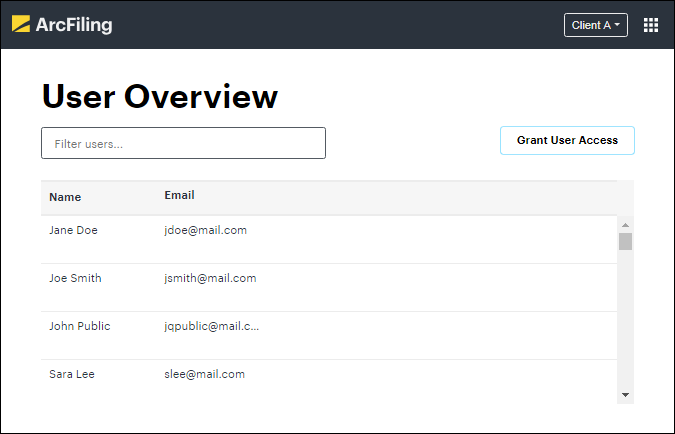
The screen displays all current application users in alphabetical order (by first and last name), along with their respective e-mail addresses for the currently-selected client.
Use the search box at upper-left of the screen to filter the listing of users in view while you’re working.
-
To view and/or edit the profile of any existing user, click the row in the listing that represents him/her to open the user detail screen.
You can manage the roles assigned to the user with respect to both client administration (i.e., ability to manage fund information) and user administration (i.e., access level for specific complexes or registrants) by carrying out the steps outlined below. N-CEN and N-PORT user rights need to be assigned separately in each designated tab.
-
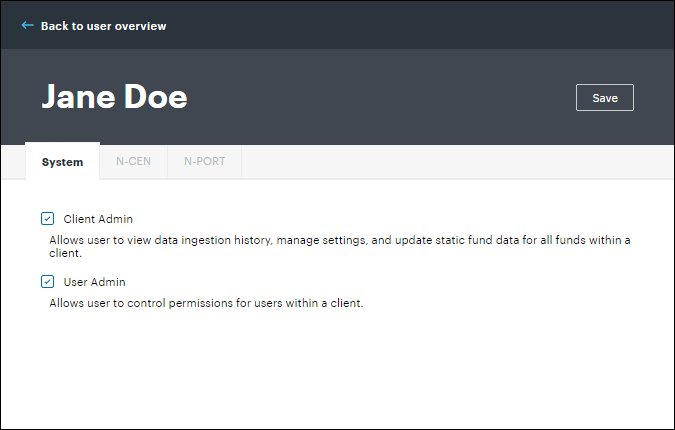
- To assign the user one or more roles with respect to the currently-selected client, select the check box(es) for the desired role(s) to assign.
-
A set of predefined roles is available for selection:
-
“Client Admin”
- The user has permissions to view data ingestion history.
- The user has permissions to manage fund settings.
- The user has permissions to update static fund data.
-
“User Admin”
- The user has permissions to view and edit user access for the selected client.
- The user has permissions to grant access to new users for the selected client.
-
-
-
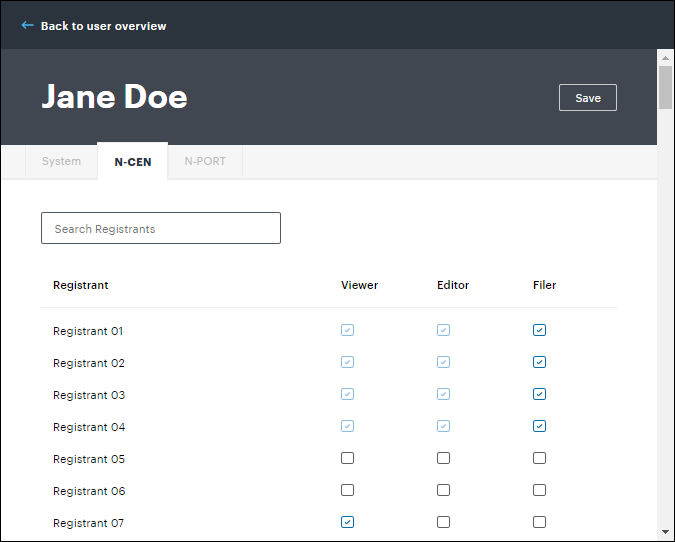
Select the check box at right of each registrant to assign the user the desired role in association with that registrant.
Use the search box at upper-left of the tab to filter the listing of registrants in view while you’re working.
-
A set of predefined roles is available for selection:
-
“Viewer”
- The user has permissions to view all N-CEN application functions. All editing controls are visible, but the underlying functions are disabled.
-
“Editor”
- The user has all permissions of the N-CEN “Viewer” role, plus the ability to edit answers and clear exceptions in form N-CEN.
-
“Filer”
- The user has all permissions of the N-CEN “Editor” role, plus the ability to submit a filing to the SEC.
-
-
-
-
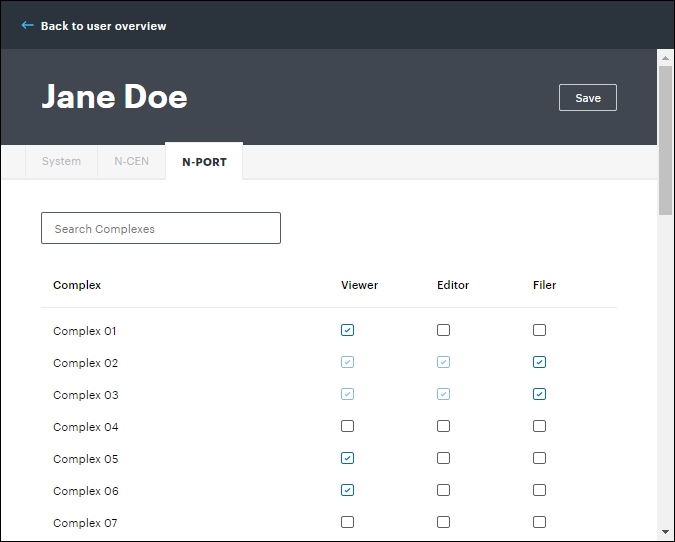
Select the check box at right of each registrant to assign the user the desired role in association with that complex.
Use the search box at upper-left of the tab to filter the listing of complexes in view while you’re working.
-
A set of predefined roles is available for selection:
-
“Viewer”
- The user has permissions to view all N-PORT application functions. All editing controls are visible, but the underlying functions are disabled.
-
“Editor”
- The user has all permissions of the N-PORT “Viewer” role, plus the ability to edit answers and clear exceptions in form N-PORT. The user can also upload and purge N-PORT data.
-
“Filer”
- The user has all permissions of the N-PORT “Editor” role, plus the ability to submit a filing to the SEC.
-
-
- Click the “Save” button at upper-right of the screen to save your changes.
- Click “Back to user overview” at upper-left of the screen at any time to go back to the list of users.
-
-
If you are assigned either the “Client Administrator” or “User Manager” role for a given client, click the “Grant User Access” button at upper-right of the screen to manage initial complex access for new application users via the “Grant User Access” screen.
In order to grant a user initial access to ArcFiling, there are DFIN setup tasks that must be carried out.
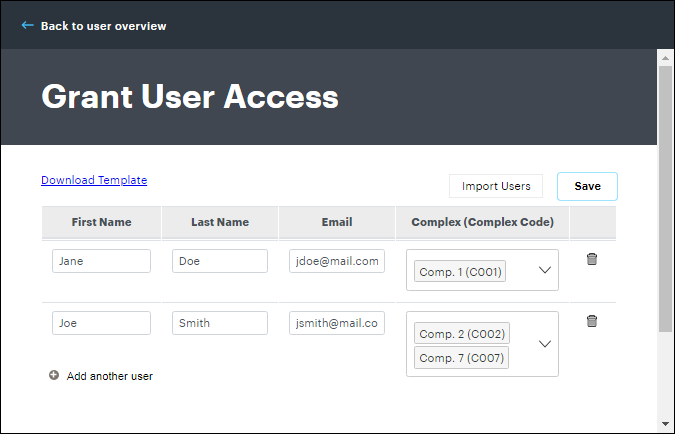
“Grant User Access” screen You can grant new application users initial access to one or more complexes associated with the currently-selected client by carrying out the steps outlined below.
-
To associate one or more roles with a single new user for the currently-selected client, do the following:
- Provide a first name, last name and valid e-mail address for the user in the corresponding fields on the screen.
- Click the drop-down list at right of the row, and then select the check box(es) for the desired role(s) to assign.
-
To associate one or more roles with a large list of new users, do the following:
-
Click the “Download Template” link at upper-left of the screen to save a copy of the user access import template to your local or network drive.
You can also download a user access import template via the ”Downloads” topic of the online Help system.
- Open the saved CSV template in an appropriate application.
- For each new user, provide a first name, last name, valid e-mail address and comma-delimited list of complex codes in the corresponding columns of the import file (each user in a separate row).
- Save the file.
- Click the “Import Users” button at upper-right of the “Grant User Access” screen, and then select/open the saved import template.
- Make any necessary adjustments to the values displayed on the screen for each new user.
-
- Click the “Save” button at upper-right of the screen to save any updates you make.
- Click the “Delete” button at right of the complex drop down menu to delete a user.
- Click “Back to user overview” at upper-left of the screen at any time to go back to the list of users.
Whether managing settings for a few manually-entered users or using the “Import Users” functionality, click the “Add another user” link at lower-left of the screen at any point before saving to create records for additional users.
-
